Backgrounds
Creating backgrounds is often a matter of trial and error using a combination
of filters.
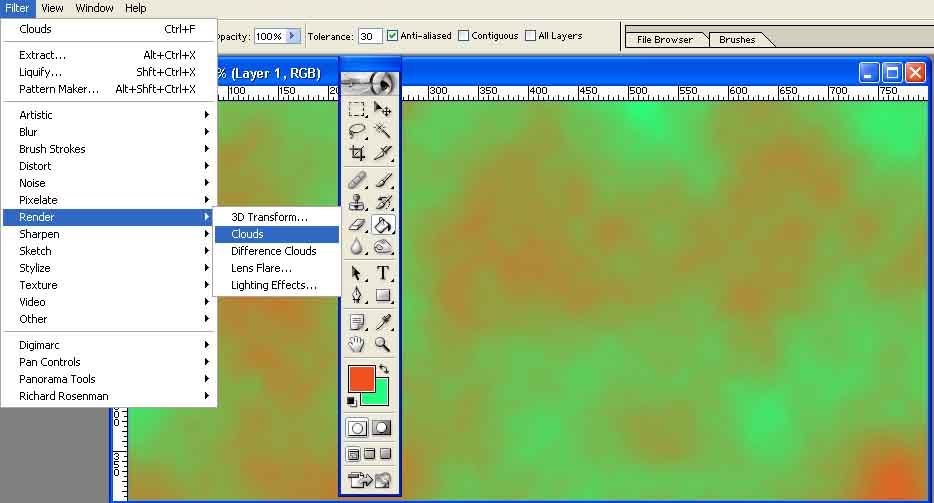
For wishy washy backgrounds try the clouds filter on a blank canvas setting
the foreground and background colours, the result is different every time so
reapply the filter until you get something you like
Pick two similar colours for a more subtle effect
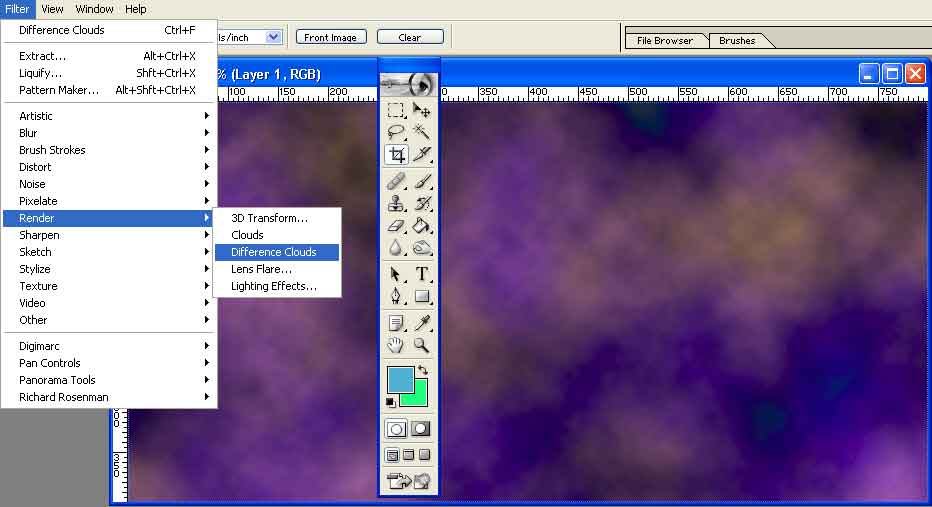
For a more striking effect then select a new foreground colour and use the
difference clouds filter. This will create a huge change as it takes the difference
between the colours randomly generated and what is already there.
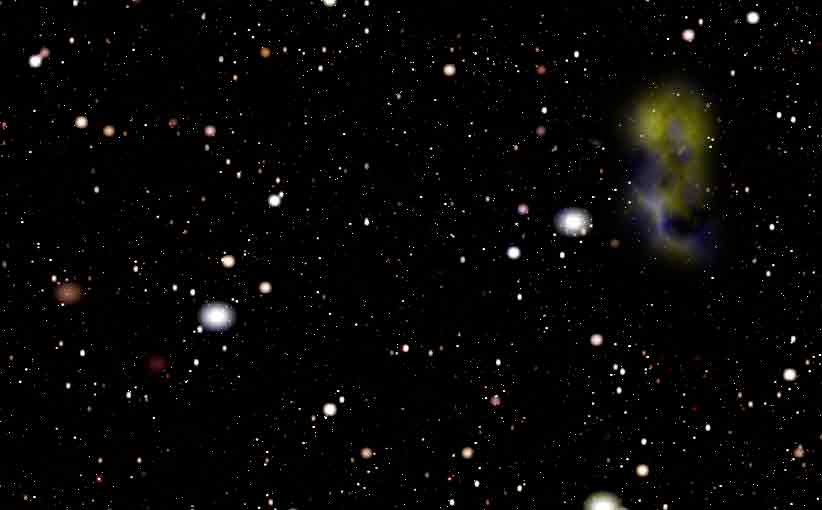
Creating a Starfield
- Create a new image. the size of the cover but at 72dpi (normal screen resolution)
- Zoom to 100% (To give you an idea of final printed size)
- Use the Paint Bucket tool to fill the background layer with black
- Go to Filter> Noise> Add Noise... Set the Amount
to 20% and make sure Gaussian and Monochromatic
are checked.
- Go to Image> Adjust> Levels. Below the histogram move the left-most
arrow to about 120 and the right to about 150 . What you're doing is knocking
out the dimmer colors in the image, which is what most of the image is at
this point, leaving only the bright colors which better represents stars.
- Name the layer "Point stars"
- Create larger stars
- With the rectangular marquee
- Select about a quarter of the image by area in the correct proportion
- Duplicate the layer (Ctrl J)
- Select a quarter that
- Duplicate the layer (Ctrl J)
- Select a quarter that
- Duplicate the layer (Ctrl J)
- Select a quarter that (this should only be 4 or 5 stars)
- Duplicate the layer (Ctrl J)
- Resize all layers to the full size.
- Set the layer mode of all layers to screen
- Duplicate each layer except "Point stars" (this will make the
stars brighter)
- Duplicate the "Point stars" layer and name it "Blurred"
- On the "Blurred" layer Filter > Blur > Gaussian Blur
apply a blur of 0.5 (gaussian blur simulates the type of blurring present
in photographs that are out of focus).
- Create a new Levels filter layer
- Set the black point to about 100 and white point to about 240 (do this by
eye as to what looks right)
- Flatten image (Ctrl shift E)
- Save the image.
Stars in real life stars are different colors, ranging from blue, red, yellow,
white, and subtle shades of those. To color them,
- Add a new layer
- Set foreground colour to blue
- background to yellow
- Filter>render>Clouds
- Filter>render>Difference Clouds
- Filter>render>Difference Clouds
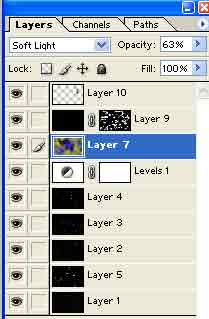
- Set layer mode to soft light
Add nebulae.
- Add a new layer
- Set foreground colour to yellow
- background to blue
- Filter>render>Clouds
- Filter>render>Difference Clouds
- Filter>render>Difference Clouds
- Select a random section
- Feather 32 pixels
- Scale the image down
- Move to a location
- Reduce opacity if required
Alternatively (and and possibly better) grab a nebula image from NASA
Make it more isolated
- Create a new layer
- Fill with black
- Add a layer mask
- paint out or paint in the stars