|
||||||||
Layer Masks |
||
Layer masks are a simple way of non destructively removing or modifying parts of an image |
||
BasicsLayer masks are a greyscale image attached to a layer. Where the mask is black the main image is hidden, white it shows and 50% grey is 50% transparent. |
||
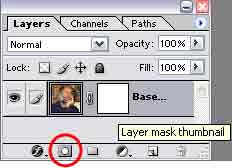
Creating a maskTo create a mask simply select the layer and click on the mask icon. This add an icon to the layer showing the mask.
|
||
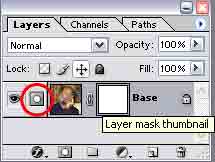
Hiding parts of an imageIf you click on the mask icon any painting is on the mask, to paint on the image itself you need to click on the picture icon. Whether you are painting on the mask or image is shown in two ways. If painting on the image an icon of a paintbrush is in the second box next to the eye icon whereas if painting on the mask the the icon is replace by a mask icon similar to the one for creating a mask. In addition either the mini image of mask has an additional border.
All of the standard painting tools work on the mask so you can use tools such as gradient bucket. A white to black gradient will fade out the image as the gradient darkens.
|
||
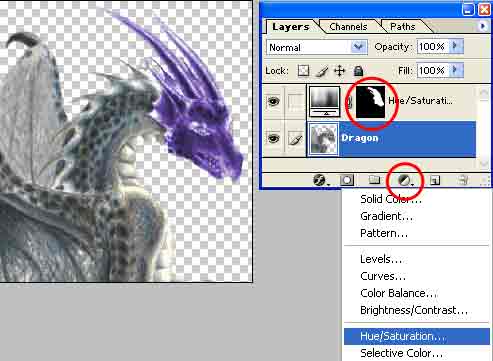
Applying effects locallyBy adding effect layers then a mask to the layer the effect will only occur where the mask allows. For this dragon I created a hue/saturation layer and a layer mask. Setting the hue/saturation to colourize and a purple hue I then filled the mask with black and painted in the head with a white brush thas allowing the layer to only effect the head.
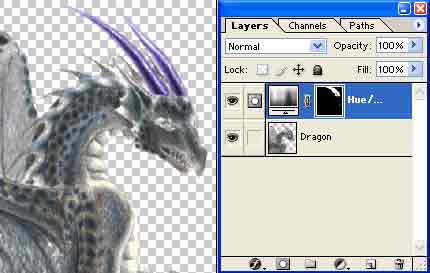
The advantages of this method over selecting an area then applying the hue is that I can both change the hue later and paint in or out areas of the body for it to affect. It is totally non-destructive as no change has happened to the original layer. Here, I've changed the mask to only paint the horns.
|
||