|
||||||||
Basic Layers |
||
What is a layerAn image displayed on the screen is flat, just like looking at a poster of an oil or watercolour painting, however if you went back to the original you'd find that it had many layers, starting with the canvas the artist may well have applied a uniform layer of colour often white to create a bright surface on which to paint, then the other colours are applied one at a time sometimes building up many layers, and as many paints are translucent rather than opaque, the layer underneath tints the final image. It's like painting a light colour on a wall when the previous occupant had painted it dark blue, one layer of white will not hide the colour. Photoshop also allows you to build up pictures in the same way with the advantage that you can go back and modify the layers underneath - try doing that to a wall. |
||
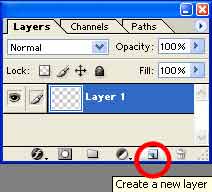
Manipulating layersOn a new image there is only one layer called "Layer 1" and it is blus to show it is active, when you paint you are painting on this layer.
To create a blank layer
To delete a layer
If you open a flat image the single layer will be called background and you will be prevented from making most alterations to the layer. Renaming the layer (double click on the name) will allow you to alter it. Generally the first thing to do is duplicate the background layer and work on the copy, this preserves the original image in case you make a big hash of it |
||
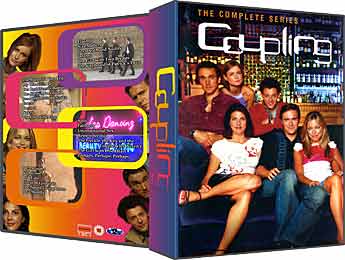
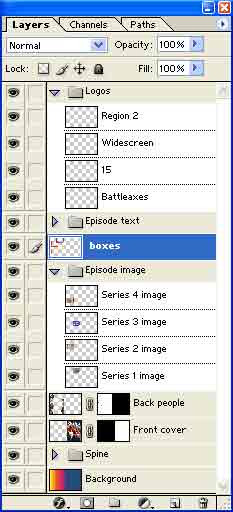
Working with layersFor any serious creation you will end up with a host of layers. My simple Coupling cover
has 22 layers, these are organised into sets for simplicity as these can be rolled up and hidden (as the 8 episode text layers have)
If you erase bits of a layer the layer underneath will show through, so its simple to keep everything on different layers, in fact every time you paste anything or write text it will create a new layer for you. Thus all my logos are on seperate layers identified by name but in a set called logos. |
||
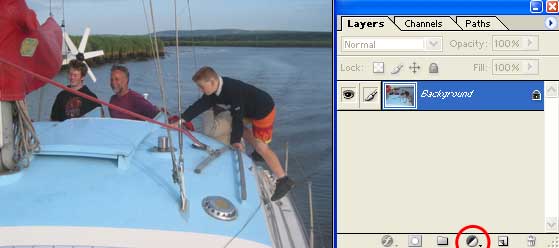
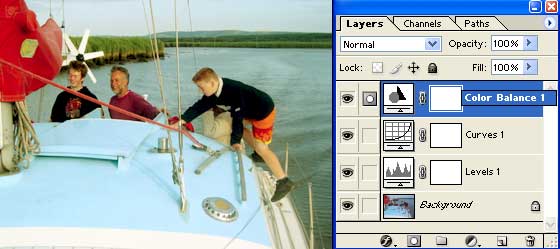
Adjustment layersAdjustment layers are layers which adjust the layers beneath them. Instead of applying the levels command to an image directly and permanently changing the data the levels command can be applied as a layer effect instead, this has the advantage of keeping the original data intact and allowing you to change the values later. This unadjusted photo was taken on a dull day
Applying three layer masks I have used levels to increase the contrast, curves to increase the brightness and colour balance to pump the red and green whilst reducing the blue to make the day seem sunnier.
If I don't like the amount I raised the brightness with curves after applying the colour balance I can change the curves (or any other) effect by double clicking on the curve icon. Each adjustment layer automatically adds a layer mask which can be used to constrain the adjustment to certain parts of the image. |
||
Layer effectsTo reduce the effect of an adjustment layer or to let an image below shine through adjust the the opacity of a layer |
||